As many as 25,000 stores could close this year in response to the COVID-19 pandemic, according to Coresight Research. But while in-store retail traffic has slowed for most businesses, online purchases are booming.
In fact, the amount customers spent online with U.S. retailers grew more than 30% in the first half of 2020. And online spending accounted for nearly 19% of total retail sales during this period.
Clearly, stores that are set up to sell online have an advantage right now. And thanks to Facebook Shops, it’s easier than ever for small businesses to launch an ecommerce store.
By setting up a free Facebook Shop, sellers can easily create an online store that lives on Facebook and Instagram and enables shoppers to browse and buy within two of the most popular social media apps. Let’s take a look at what a Facebook Shop is and what it can do for your business, as well as how to start your own.
What is a Facebook Shop?
A Facebook Shop is a mobile-first shopping experience that lives inside both the Facebook app and the Instagram app. Nearly a million businesses have already started selling on it.
The Facebook Shop experience feels native to both social networks and works on any device, but it’s designed primarily for mobile. Because of this mobile focus, Facebook has enabled sellers to communicate with customers within chats in Facebook Messenger, Instagram Direct, and WhatsApp. And soon, shoppers will be able to make purchases within these chats.
Consumers can find shops on a business’s Facebook Page or Instagram profile. They can also be discovered through ads and Instagram Stories. And sellers can also customize the layouts and colors of their shops to give their stores a more branded look.
Any Facebook or Instagram business can set up Facebook Shops, and if you’re already selling on a popular ecommerce platform, your setup is even easier. Facebook has partnered with numerous selling platforms, including Shopify, WooCommerce, BigCommerce, Channel Advisor, and more to make the integration a breeze.
How much are Facebook Shop fees?
It’s free to set up a Facebook Shop, and right now it’s free to use Commerce Manager, but Facebook will begin charging fees on each purchase through Commerce Manager in 2021. However, Facebook says monetization of Facebook Shops will primarily come from advertising.
When a sale is made through your Facebook Shop, a selling fee will be deducted from your payout automatically. The selling fee is a flat fee of 40 cents for shipments of $8.00 or less, or 5% per shipment.
For example, if a purchase is $5, the selling fee would be a flat 40 cents. However, for a $10 purchase, the selling fee would be 50 cents.
The fee applies to all transactions on Facebook and Instagram when using Commerce Manager, and it includes both taxes and the cost of payment processing.
There may also be charge-back fees applied to your account in the event a customer files a charge-back. If this occurs, Facebook will place a hold on the transaction until the claim is resolved.
Learn more about Facebook Shop fees.
How to set up a Facebook Shop
You can have your Facebook Shop up and running in the same day with just a few simple steps.
1. Add products.
Before you can launch your Facebook Shop, you first need to have a catalog of products to work with.
You can add products manually, do a bulk upload, or add items with the Catalog Batch API. If you have already uploaded products to Facebook or are using product tags on Instagram, you’re already set up and ready to go. Or, if you sell on an ecommerce platform like WooCommerce or Shopify, you may also be able to import your products to Facebook directly.
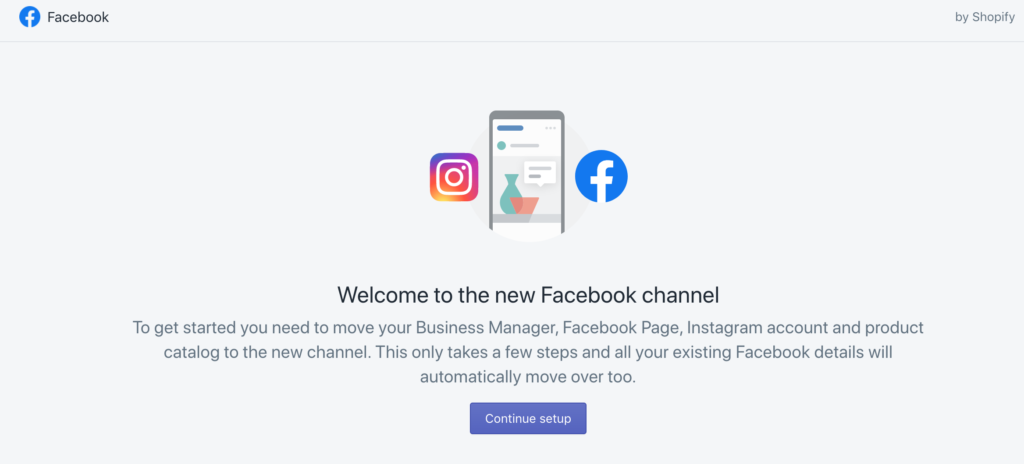
For example, Adventure Cats has a Shopify-based store and was already selling on Facebook. So to get started with Facebook Shops, the business simply had to install Shopify’s Facebook channel and move the store’s existing information to the new channel, as illustrated above.
2. Create collections.
Collections are groups of 6-30 selected products that can be organized any way you like: by product type, seasonal events, sales, trends, and more. And they’re what visitors will see first upon arriving in your store.
Once your products are uploaded, you can create a collection by navigating to Commerce Manager, a set of tools that enables you to manage your shop on both Facebook and Instagram. Commerce Manager is currently available only on desktop.
In the left-hand menu, select “Shops” and then “Collections,” as illustrated below.

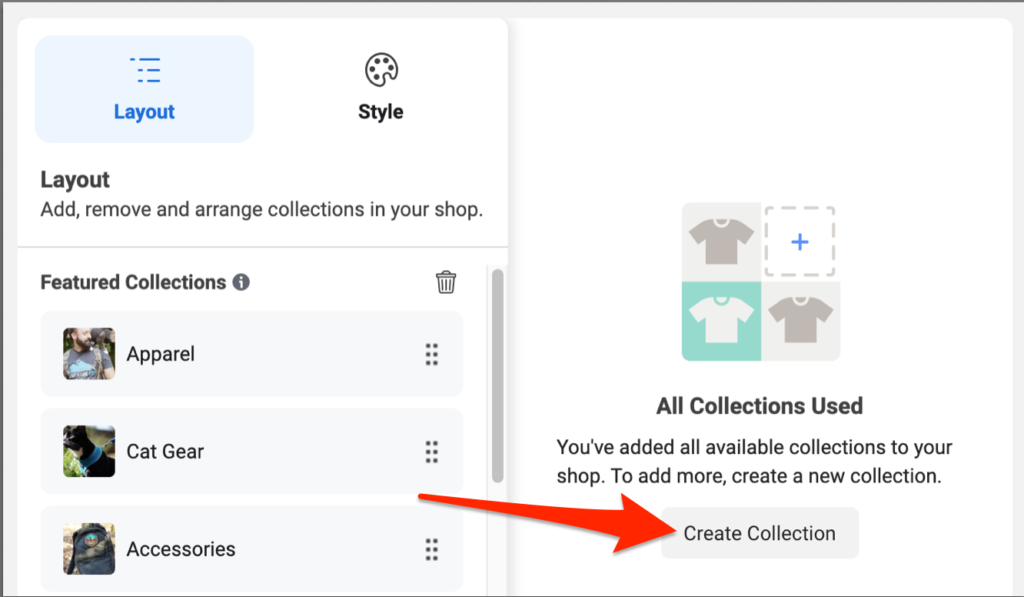
Then, click “Create Collection.”
Next, you’ll need to name your collection and select a cover image that’s at least 800 x 600 pixels. The recommended size is 1080 x 810 pixels. You also have the option to add a brief description about this collection of products.
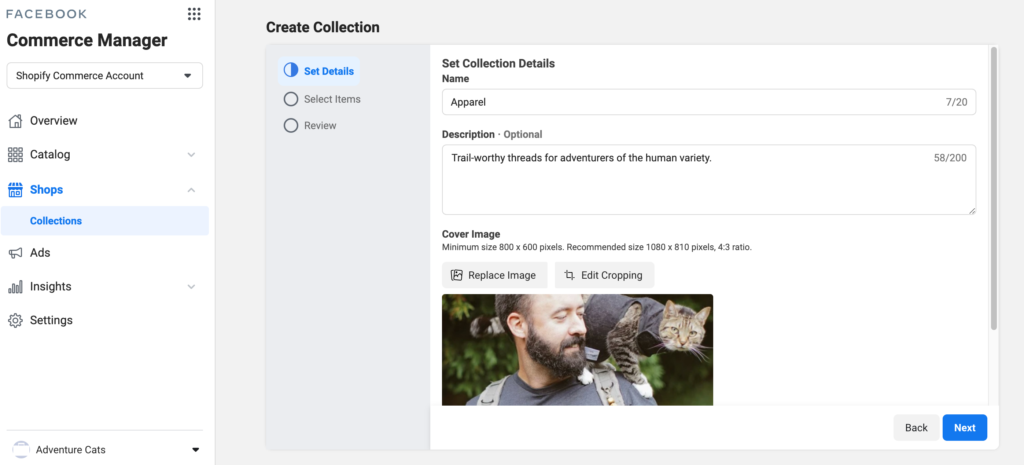
Once this information is filled out, click “Next” to begin adding products to your collection. The minimum number of products that must be added is six, but you can add up to 30.
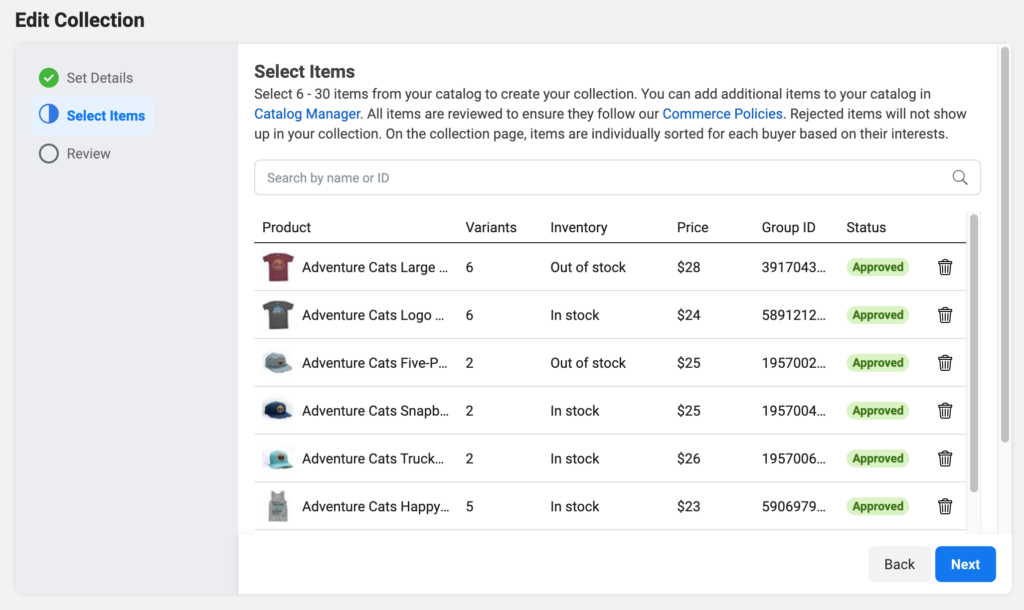
The same product can be added to more than one collection. For example, if your Facebook Shop has a collection titled “Shirts” and another titled “Best Sellers,” you could include the same best-selling T-shirt in both collections.
Once you’ve added products to your collection, click “Next.” You’ll be prompted to review your collection details and confirm that you’re satisfied with them.
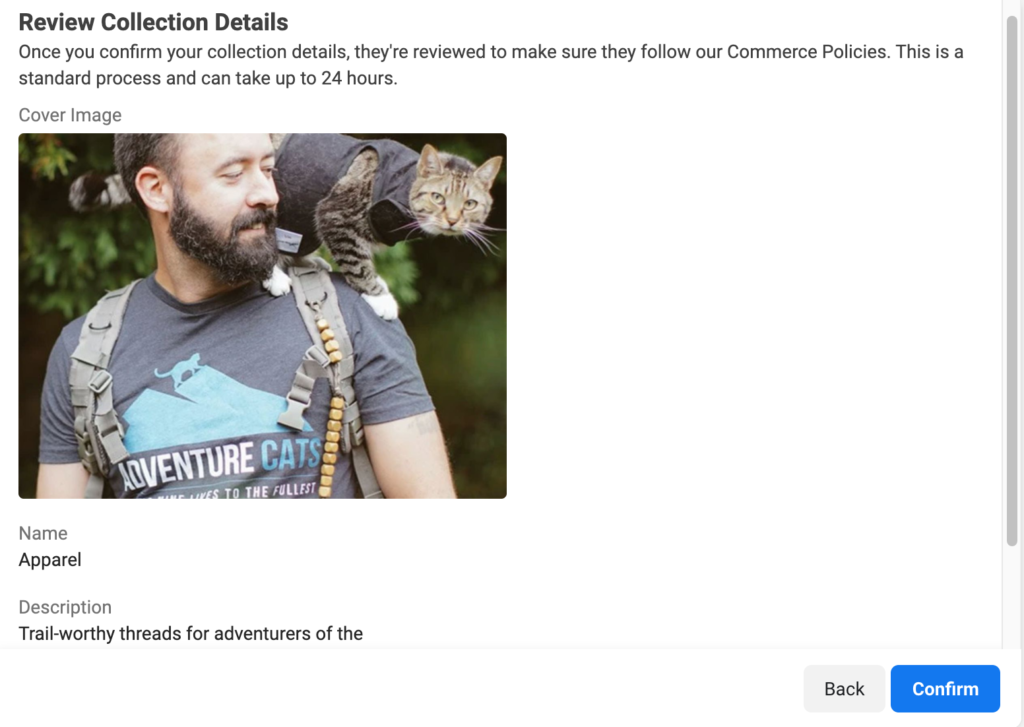
Now that your collection is submitted, Facebook will review it to ensure that it meets the social network’s commerce policies. Once your collection is approved, you’ll be able to customize your Facebook Shop by choosing collections to feature at the top of your store.
When your collections are approved and added to your shop, they’ll look similar to this example from the Adventure Cats Facebook Shop.
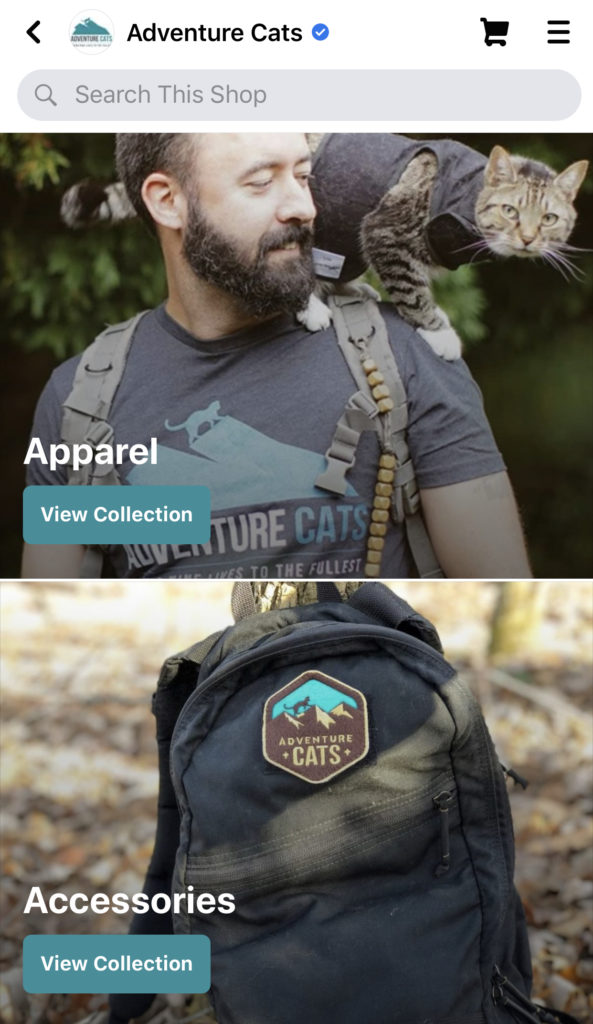
Visitors to your store simply click “View Collection” to browse the products available within each collection.
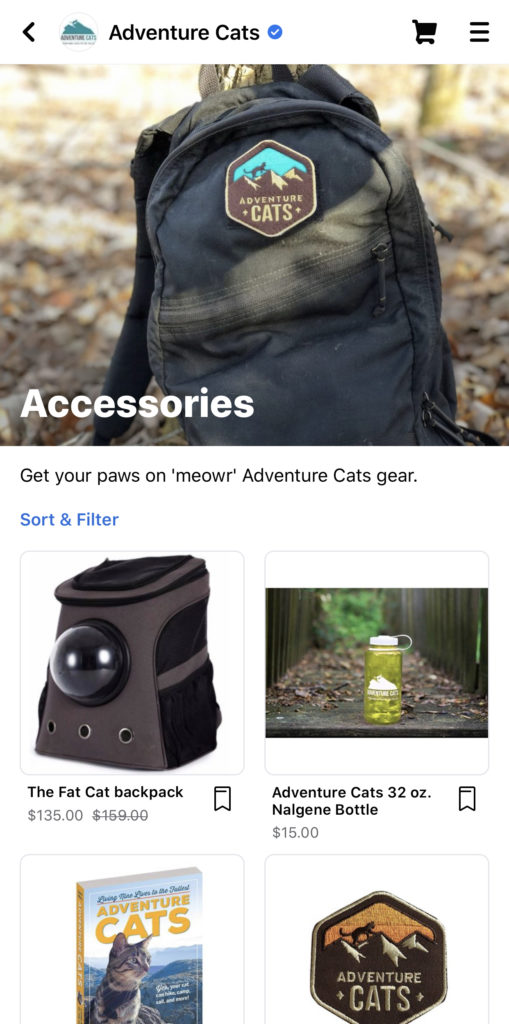
From there, they can select a specific product to learn more about it, see additional images, and even make a purchase.
3. Customize your Shop.
Sellers can customize their Facebook Shop within Commerce Manager and alter the layout and style. The shop will look the same on both Facebook and Instagram.
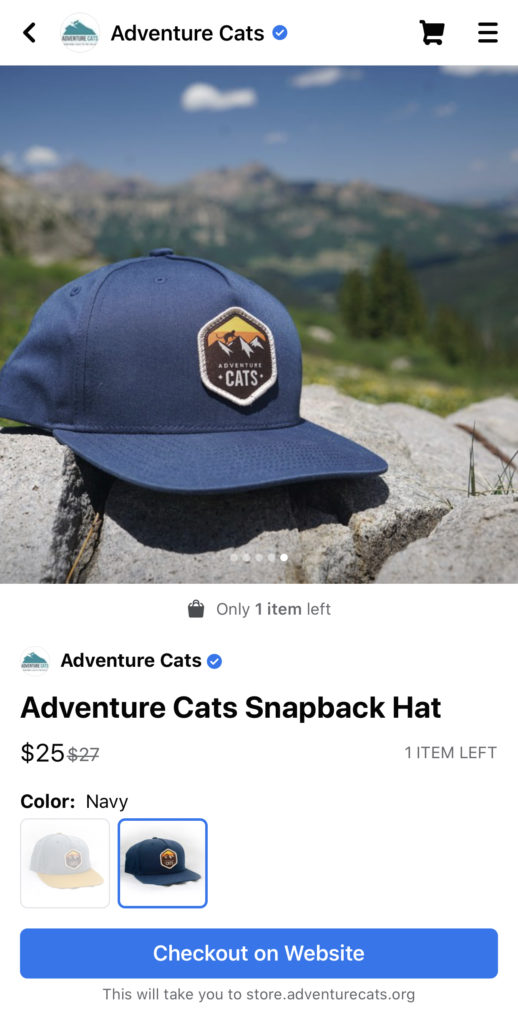
To make changes to the look of your storefront, select “Shops” in the left-hand menu, and then click the blue “Edit” button next to your shop.
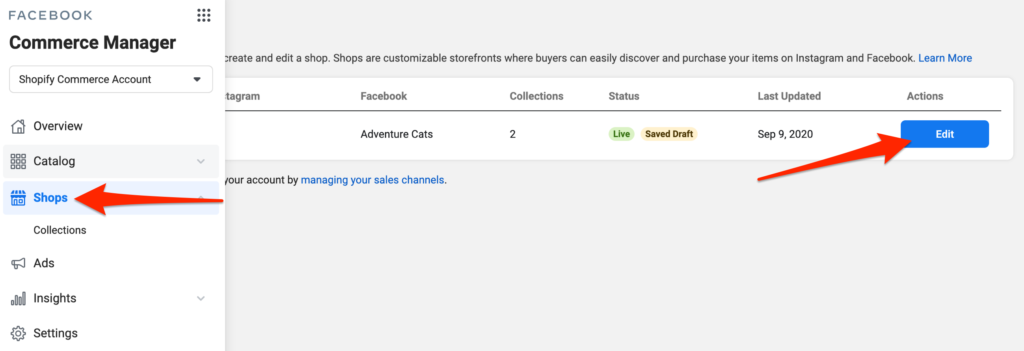
From here, you can click on “Layout” to add or remove featured collections to your shop. You can also arrange them in the order you want by clicking on the six dots to the right of a collection and dragging it and dropping it to where you want it.
The preview on the right-hand side will update to show you how your shop looks on both Facebook and Instagram.
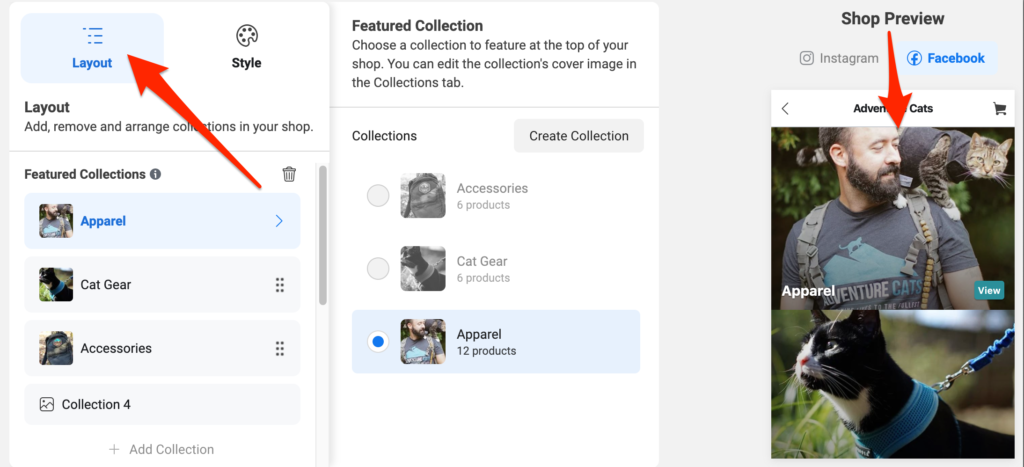
You can also edit the text and buttons of your store by clicking “Style” in the righthand menu.
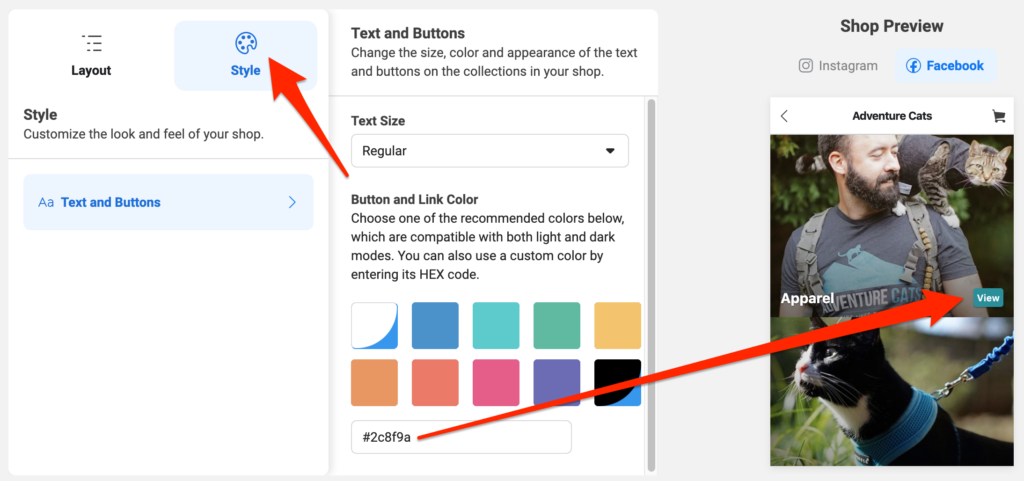
Here, you can select your shop’s text size, as well as the color of the buttons. Select one of the suggested colors, or enter a custom HEX code to match the exact color of your brand like Adventure Cats did.
5 tips to make your Facebook Shop a success
Keep consumers browsing for longer — and persuade them to add more items to their cart — by creating an optimal shopping experience.
1. Craft enticing copy.
This applies to the text that appears in not only your shop collections but also your social profiles.
Make sure your collections have clear, descriptive names or are easily understandable so customers know what they’re browsing. For example, a collection title like “On Sale,” “T-shirts,” or “Fall Favorites” communicates a theme, while “New Collection” is less clear.
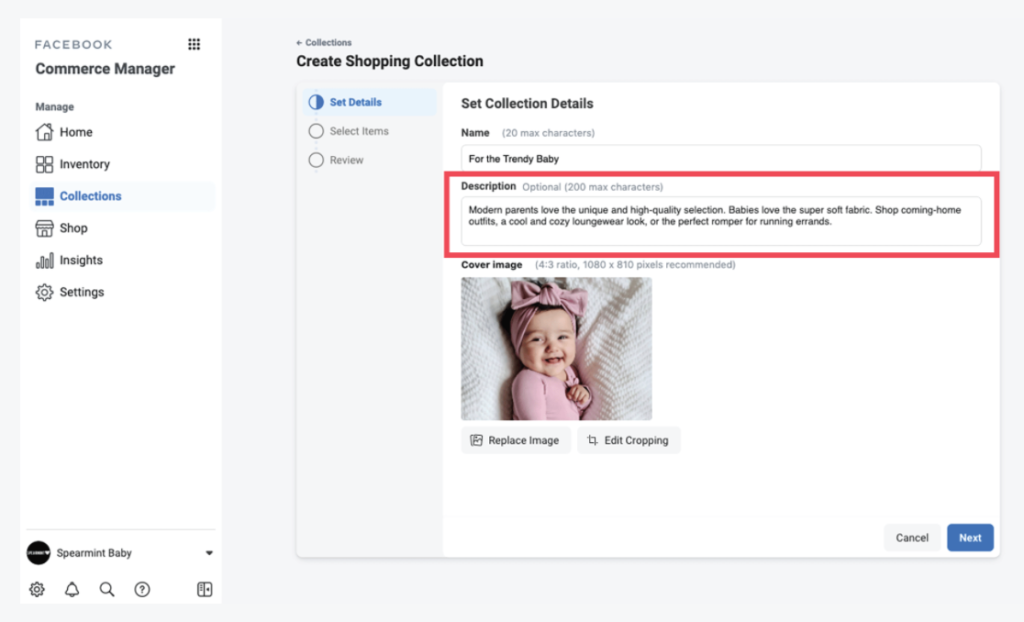
Keep your descriptions concise so they’ll be easy to skim on mobile. Use your brand’s voice, and indicate if the collection is part of a limited-time offer.
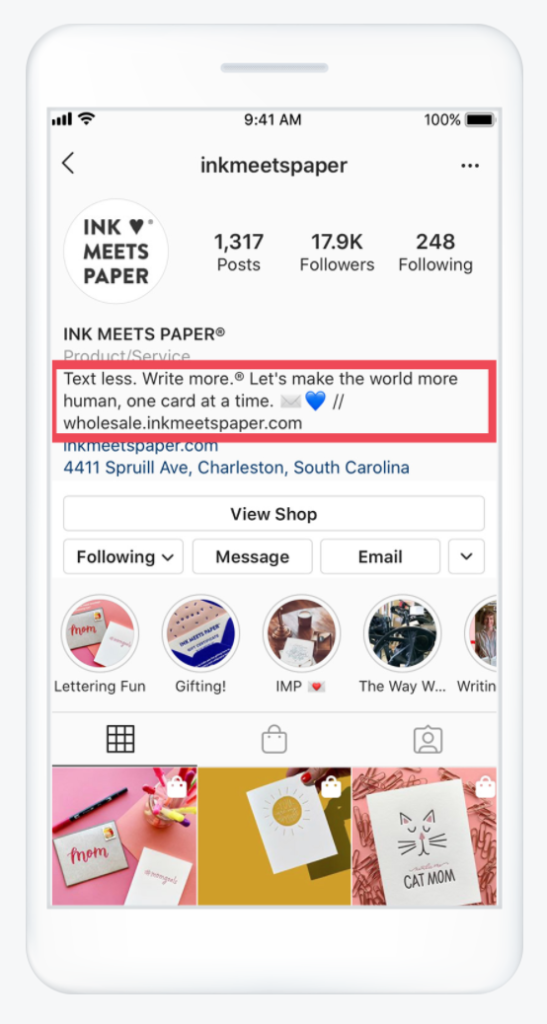
The copy on your Facebook and Instagram bio should also succinctly explain what your shop has to offer and inspire customers to take action.
2. Select eye-catching imagery.
Lifestyle photos and product pictures also play an important role in drawing potential customers in, especially with collections.
The hero image is the main image, which appears as the main photo of your collection. It should not only encompass the products in the collection but also be consistent with your brand.
Consider how your chosen hero image will appear on mobile, and always review it on a mobile device. Look for creative ways to tease your collections, and avoid using stock imagery.
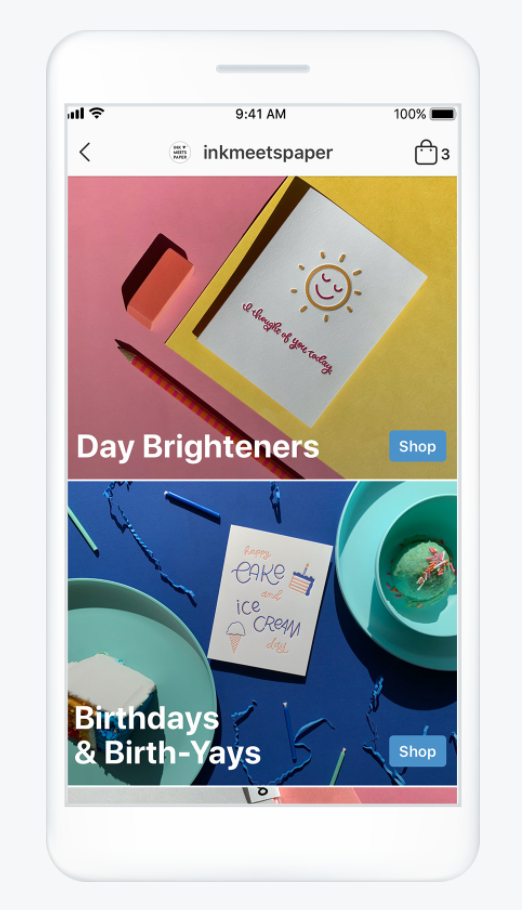
Need a little help taking killer product pics? Check out our guide to taking perfect product photos.
3. Experiment with creative elements.
Try out different photos and calls to action to see what performs best.
For example, you may find that user-generated content gets greater engagement than product photos you’ve taken yourself. Or you might discover that inviting shoppers to “Check out the latest fall fashions” gets more people to click on a collection than simply suggesting they “Shop now.”
4. Use Facebook Shop Insights to keep an eye on metrics.
Just as there are insights to help track the performance of Instagram Stories and Facebook posts, there are also analytics for your Facebook Shop. This data is accessible by selecting “Insights” in the left-hand menu of Commerce Manager.
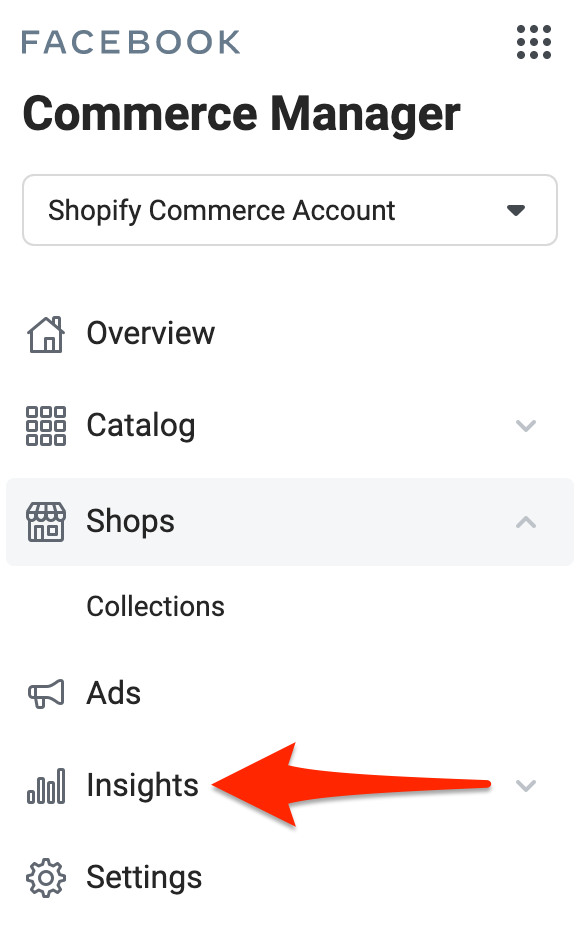
The information located here shows sellers how users interact with the Facebook Shop.
The Overview dashboard enables sellers to see how the shop is performing and makes it easy to spot trends. The Products dashboard provides insights into each product you have for sale.
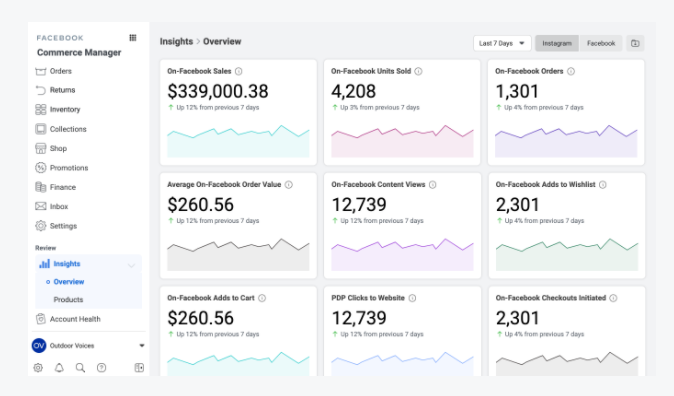
Sellers can also delve deeper into metrics by looking at specific time frames, particular product listings, and more.
5. Advertise your shop.
It’s easier for your current Facebook and Instagram followers to discover your Facebook Shop because they’ve already opted in to see your posts, but if you want to reach new customers, you’ll have to advertise.
You can set up ads in Commerce Manager by selecting “Ads” from the left-hand menu. From here, you must opt to run a traffic ad or a dynamic ad.
Traffic ads are optimized to drive users to your website or app or even a Messenger conversation. For example, you could set up a traffic ad to direct potential customers to message you about finding their perfect fit from your apparel store. To run this type of ad, you must have at least four products in your catalog.
Dynamic ads, on the other hand, rely on machine learning to automatically deliver relevant offerings to users, based on their interests and actions. So instead of creating an individual ad for each product in your catalog, you can set up one campaign that’ll promote every product you sell, based on what each customer is most likely to buy. When a person expresses interest in a product, Facebook will generate an ad for that person and deliver it automatically on mobile, tablet, and desktop.

Facebook recommends running dynamic ads only if you have at least 20 items for sale in your shop.
Set up your Facebook Shop today
Your ecommerce business may already be advertising on Facebook and using product tags on Instagram, but until you actually set up your shop in Commerce Manager, customers won’t be able to browse your store and make purchases as easily.
Luckily, if you’re already selling on Facebook or Instagram, you already have a product catalog, so it won’t take long to create collections and customize your shop. In fact, you can be set up and selling in just a matter of minutes.

